


Évaluations - 4, GPA: 4
(

 )
)
|
Photos et spécifications Yamaha YST-SW45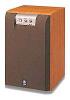 |


Facilité d'utilisation
3 Placement .................................................................. 3 Connections ............................................................... 4 Controls and their functions ....................................... 7 FEATURES Adjusting volume ........................................................ 8 Advanced YAMAHAActive Servo Technology..........10 Troubleshooting ........................................................ 11 Specifications ........................................................... 11 • This subwoofer system employs Advanced YAMAHA Active Servo Technology which YAMAHA has developed for reproducing higher quality super-bass sound. (Refer to page 10 for details on Advanced YAMAHA Active Servo Technology.) This super-bass sound adds a more realistic, theater- in-the-home effect to your stereo system. • This unit can be added easily to your existing audio system by connecting to either the speaker terminals or the line output (pin jack) terminals of the amplifier. PLACEMENT • For the effective use of this unit, this unit’s super-bass sound must be matched to the sounds of your main speakers. You can create the best sound quality for various listening conditions by using the HIGH CUT control. • The Automatic Standby function saves you the trouble of pressing the STANDBY/ON button to turn the power on and off. A. C ( : subwoofer, : main speaker) One subwoofer will have a good effect on your audio system, however, the use of two subwoofers is recommended to obtain more presence. If using one subwoofer, it is recommended to place it on the outside of either the right or the left main speaker. (See fig. A.) If using two subwoofers, it is recommended to place them on the outside of each main speaker. (See fig. ..) The placement shown in fig. C is also possible, however, if the subwoofer system is placed directly facing the wall, the bass effect may die because the sound from it and the sound reflected by the wall may cancel. To prevent this, face the subwoofer system obliquely to the wall as in fig. A or .. Note There may be a case that you cannot obtain enough super- bass sounds from this unit when listening at the middle of the room. This is because “standing waves” have developed between two parallel walls and the bass sounds are canceled. In such a case, face the unit obliquely to the wall. It also may be necessary to break up the parallel surfaces by placing bookshelves etc. along the walls. Use the rubber pads Put the provided rubber pads at the four corners on the bottom of the subwoofer unit to prevent the subwoofer unit moving due to vibrations etc. 3 CONNECTIONS CONNECTIONS • When making connections between this unit and other components, be sure all connections are made firmly and correctly; L (left) to L, R (right) to R, + to + and – to –. • This unit can be connected to either the speaker terminals or the line output (pin jack) terminals of the amplifier. Choose one of the connections shown below according to your audio system. Refer also to the owner’s manuals supplied for your audio system. CONNECTING TO SPEAKER TERMINALS OF THE AMPLIFIER Using one unit When your amplifier has one set of speaker terminals • Disconnect your main speakers from the amplifier if connected, and connect them to the speaker terminals of this unit. Left speaker Right speaker This unit Amplifier To AC outlet OUTPUT INPUT2 TO SPEAKERS INPUT1 FROM AMPLIFIER LOW HIGH OFF AUTO STANDBY POWER ON OFF OUTPUT INPUT2 AUTO TO SPEAKERS INPUT1 FROM AMPLIFIER LOW HIGH OFF STANDBY Speaker terminals When your amplifier has two sets of speaker terminals Left speaker Right speaker A B OUTPUT INPUT2 TO SPEAKERS INPUT1 FROM AMPLIFIER LOW HIGH OFF AUTO STANDBY POWER ON OFF OUTPUT INPUT2 TO SPEAKERS INPUT1 FROM AMPLIFIER LOW HIGH OFF AUTO STANDBY Amplifier Speaker terminals To AC outlet This unit (Both A and B speaker outputs must be ON.) Using two units Using two units Right speaker Left speaker English OUTPUT INPUT2 TO SPEAKERS INPUT1 FROM AMPLIFIER LOW HIGH OFF AUTO STANDBY OUTPUT INPUT2 TO SPEAKERS INPUT1 FROM AMPLIFIER LOW HIGH OFF AUTO STANDBY POWER ON OFF OUTPUT INPUT2 TO SPEAKERS INPUT1 FROM AMPLIFIER LOW HIGH OFF AUTO STANDBY POWER ON OFF OUTPUT INPUT2 TO SPEAKERS INPUT1 FROM AMPLIFIER LOW HIGH OFF AUTO STANDBY To AC outlet This unit This unit To AC outlet Amplifier Speaker terminals Connecting to this unit’s OUTPUT/INPUT terminals For connections, keep the speaker wires as short as possible. * Banana Plug connections are also possible (except for U.K. (Cut the excessive wire, if necessary.) If the connections are faulty, and Europe models). Simply insert the Banana Plug con- no sound will be heard from the speakers. Make sure that the nector into the corresponding terminal. polarity of the speaker wires is correct, by observing + and – markings. If these wires are reversed, the sound will be unnatural and will lack bass. Do not let the core of the speaker wires touch each other and do not let them touch the me...