

 )
)
|
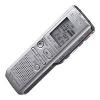
Photos et spécifications Sony ICD-P110 |
Par ce dispositif a également d'autres instructions :
Facilité d'utilisation
1 Press MENU to enter the menu mode. 1 Press – . or >+ to select the digits of the year. 1 Press – . or >+ to select the digits of the hour. 2 Press NxPLAY/STOP. The minute digits will flash. 2 Speak to the built-in microphone. OPR indicator (lights in red during recording.) Message 1 Message 2 Newly recorded message Blank space OPR indicator (lights in green during playback.) The memory is nearly full. 2 Remaining memory indicator Selected message number Number of messages in a folder Recording mode If the battery compartment lid is accidentally detached, attach it as illustrated. Make sure to insert both of the batteries from their – ends. 1 NxPLAY/STOP Printed on 100% recycled paper using VOC (Volatile Organic Compound)-free vegetable oil based ink. You can erase the recorded messages one by one or all messages in a folder at a time. Note that once a recording has been erased, you cannot retrieve it. Erasing messages one by one When a message is erased, the remaining messages will advance and renumbered so that there will be no space between messages. 1 Press ERASE while playing back the message you want to erase or press ERASE for more than 1 second during stop mode. A beep will sound and the message number and “ERASE” will flash while the first and last 5 seconds of the message is played back 10 times. 2 Press ERASE while the message is being played back. The message is erased and the remaining messages will be renumbered. (For example, if you erase Message 3, Message 4 will be renumbered as Message 3. When erasing is completed, the unit will stop at the beginning of the following message.) Erasing Messages To cancel erasing Press xSTOP before step 2. To erase other messages Repeat steps 1 and 2. To erase a message partially First divide the message and then follow the steps to erase the message. Erasing all messages in a folder To cancel erasing Press xSTOP before step 3. BVarious Ways of Recording Adding a Recording Using an Adding Recording At a factory setting, you cannot add a recording not to erase the message by accidental operation. If you want to add a recording to a previously recorded message or add an overwrite recording, change the REC-OP setting in the procedures below. 1 Press MENU to enter the menu mode. 2 Press – . or >+ to display “REC-OP” and press NxPLAY/ STOP. The adding recording window will be displayed. 3 Press – . or >+ to select “ON” and press NxPLAY/STOP. The setting is changed. 4 Press – . or >+ to select “ADD” or “OVER” and press NxPLAY/STOP. •ADD: adds a recording to a previously recorded message •OVER: adds an overwrite recording. 5 Press MENU to exit the menu mode. To prohibit to add a recording In step 3 , select “OFF” and press NxPLAY/STOP. Adding a Recording to a Previously Recorded Message You can add a recording to the message being played back. When “ADD” is selected in the menu The added recording will be placed after the current message and counted as a part of the message. BOther Functions Dividing a Message You can divide a message during recording or playback, so that the message is divided into two and the new message number is added to the divided message. By dividing a message, you can easily find the point you want to play back when you make a long recording such as a meeting. You can divide messages until the total number of messages in the folder becomes 99. While recording or playing back a message, press DIVIDE at the point you want to divide. • When you press DIVIDE during recording: The new message number is added at the point you pressed the button, and the new message number and “DIVIDE“ flashes for 3 seconds. The message will be divided into two; however, the messages will be recorded without a break. 1 Tip You can divide a message during recording pause. • When you press DIVIDE during playback: The message is divided into two at the point you pressed the button, and the new message number and “DIVIDE“ flashes for 3 seconds. The message numbers of the following messages will increase by one. To play the divided message Press –. or >+ to display the message number as the divided messages each have message numbers. 1 To play the divided messages continuously Select ON for CONT in the menu as described in “Playing Back All Messages in a Folder Continuously”. Notes • If 99 messages have been recorded in a folder, you cannot divide a message. In that case, reduce the number of messages to 98 or less by erasing unnecessary messages or by moving some of the messages to another folder before dividing a message. • If you divide a message with an alarm setting, the alarm setting remains only with the former message divided. • You cannot divide a message in the first or the last 1 second. • If you divide a message frequently, the unit may become unable to divide a message. • Once a message is divided, you cannot combine the divided messages with the IC recorder. To combine messages, use the supplied application software. Moving Messages to a Different Folder...
Ce manuel est également adapté pour les modèles :Dictation - ICD-P210 (846 kb)


