


Évaluations - 4, GPA: 4
(

 )
)
|
Photos et spécifications Sony RDR-HXD795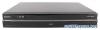 |


Par ce dispositif a également d'autres instructions :

Lecteur DVD - RDR-HXD795 (7.95 mb)
Lecteur DVD - RDR-HXD795 (7.96 mb)
Facilité d'utilisation
“Detailed Information”: Displays the detailed information for the selected JPEG image file (page 114). “Single-Mode”: Cancels “Multi-Mode.” Photo Album Printing JPEG Image Files You can print JPEG image files on the HDD, DATA DVDs/DATA CDs, or connected USB device by connecting a PictBridgecompatible printer to the USB jack on the recorder. Refer to the instructions supplied with the printer. 1 Connect a PictBridge-compatible printer to the USB jack on the recorder. DVD recorder to USB jack PictBridge-compatible printer 2 Connect the USB device to the USB jack on the recorder. When printing JPEG image files on the HDD or DATA DVDs/DATA CDs, skip this step. 3 Press SYSTEM MENU. The System Menu appears. 4 Select “Photo Album,” and press ENTER. The “Photo Album” menu appears. 5 Select the item, and press ENTER. To print JPEG image files on the HDD, select “View/Edit Photos on the HDD.” To print JPEG image files on a DATA DVD/DATA CD, select “View Photos on a DVD/CD.” To print JPEG image files from the connected USB device, select “View Photos on a USB Device.” The “Photo Album” list appears. 6 Select an album, and press ENTER. 7 Select a file using M/m, and press ,. The sub-menu appears. 8 Select the item, and press ENTER. To print two or more files, select “Multi- Mode.” To print the file selected in step 7 only, go to step 12. 9 Select a file, and press ENTER. A check mark appears in the check box by the selected item. • To clear the check mark, press ENTER again. • To clear all check marks, select “Single-Mode.” 10 Repeat step 9 to select all files you want to print. 11 Press ,. The sub-menu appears. 12 Select “Print,” and press ENTER. The display asks for confirmation. 13 Select “Start,” and press ENTER. You can set the paper size and layout. Refer to the operating instructions supplied with the printer. To cancel printing Press ENTER. To display the connected printer Select “Confirm Printer” of “USB” in the “Options 2” setup (page 142). To restart the connected USB device Select “Restart USB Device” of “USB” in the “Options 2” setup (page 142). z Hint Printing options, such as paper size or layout, differ depending on the printer. For details, refer to the instructions supplied with the printer. Photo Album Settings and Adjustments Settings and Adjustments Adjusting Picture Quality HDD RWVR RWVideo+RW +R * DVD VCDRVR RVideo DATA DVD DATA CD * * DivX video file only You can adjust the picture quality from the connected equipment, such as a TV or VCR, and also the picture quality of broadcasts that the recorder can receive by selecting a preset setting. You can also adjust the picture quality by changing detailed settings, and store up to three settings in the memory. 1 Press SYSTEM MENU in stop mode. For adjusting playback picture quality, press SYSTEM MENU during playback. The System Menu appears. 2 Select “Picture Adjustment,” and press ENTER. 3 Select a preset setting using Ce manuel est également adapté pour les modèles :
Lecteur DVD - RDR-HXD1090 (7.86 mb)
Lecteur DVD - RDR-HXD790 (7.86 mb)
Lecteur DVD - RDR-HXD890 (7.86 mb)
Lecteur DVD - RDR-HXD895 (7.86 mb)