


Évaluations - 1, GPA: 3
(

 )
)
|
Photos et spécifications Philips FW-R55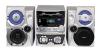 |


Facilité d'utilisation
luf)? are displayed. O To select more tracks, to be erased repeat step 2. Note: When erasing several tracks, the tracks to be erased must be selected in sequence, starting from the last recorded track. Example: The CDRW has 5 tracks recorded on it. Now, you can erase tracks 5 and 4. You can also erase tracks 5, 4 and 3, but you cannot erase tracks 5 and 3! 3 Press YES to confirm your selection. -»FPR5F? is displayed. 4 Press YES to start erasing. -» FRR5F is displayed and the operation time left starts to count down. 23 Features CD text editing (on CD recorder only) Storing text during stop mode After you have recorded your CDR(W) you can enter text, e.g. names to discs and tracks.This text will be displayed during playback on this unit, but also on other sets equipped with the CD text feature.You can enter up to 60 characters per text field. Only use an unfinalized CDR or CDRW (finalized CDRW must be unfinalized first). 1 If necessary press ■ to stop playback. 2 Press CDR to select the CD recorder 3 Press CD TEXT/EDIT to enter the text edit menu. -» CD text edit is blinking. TE Y- T EDIT is displayed. 4 Rotate N JOG CONTROL N to select either: -» RL SUM RPTI5T: for editing the CD artist -»RLUuM TITLE: for editing the CD title -»RRTI5T TF? I (or E, 3,,..): for editing the artist of track 1 (or 2,3,...) -»TITLE TP I (or c?,3,...): for editing the title of track 1 (or 2, 3,...) 5 Press YES to confirm the selection. 6 Rotate N JOG CONTROL ►! to select a character -» After selecting a character the cursor moves automatically to the next character space. 7 Repeat step 6 for adding further characters. 8 Press YES to save the characters that have been selected and to exit to the last position in the text editing menu. -»UP3RTE is displayed. Storing text during recording You can store and edit text even while recording. Editing text during finalizing Is not possible. When using high speed recording and automatic finalizing, make sure to enter the text before finalizing starts, otherwise, automatic finalizing will be cancelled. • Follow steps 3-8 of“Storing text during stop mode". Auto copied text When an artist’s name has been stored for a track, it will be copied automatically into the next track. • Press either: YES to confirm the copied text, or NO to delete the copied text and to enter a new one. Inserting a space 1 Press 44 SEARCH or ►► SEARCH to move to the position where the space is to be inserted. -» The position starts blinking. 2 Press YES to confirm the position of the insert character -* A space will be inserted after the cursor Deleting and substituting a character 1 Press 44 SEARCH or ►► SEARCH to move to the character's position to be deleted or substituted. -» The character starts blinking. 2 If you want to delete the character: Press NO. -» The character is deleted and the text is shifted one position to the left. If you want to substitute the character: Rotate N JOG CONTROL N to select a new character Press YES to confirm the selection. 0 To change another character press 44 SEARCH or ►► SEARCH. Erasing text 1 Press CDTEXT/EDIT to enter the text edit menu. -¥ CD text edit is blinking. TEX T EI'IT Is displayed. 2 Rotate I4 JOG CONTROL M to select the text erase menu: -»EPR5E IET is displayed. 3 Press YES to confirm. 4 Rotate 14 JOG CONTROL M to select one of the following: -+ RLE TEX T Ei: All text of the selected disc is chosen to be erased in one step. -»RLL TEXT Tf? I (ore?, 3,...): All text of track 1 (or 2,3,...) is chosen to be erased, -» ED IITLE: CD artist’s name and CD title are chosen to be erased. 5 Press YES to start erasing. -» The chosen text will be erased. Erasing from the memory When the text memory of your CD recorder is almost full, the messages MEHORy FULL and FINALIZE USE will be displayed. If you still want to add a new disc to the text memory, you have to finalize another disc. 24 Tuner O To store radio stations for another waveband, repeat steps 1-2, Make sure to select the next available preset number first before proceeding, otherwise, already programmed radio stations may be erased, O To exit the automatic programming press ■ . Tuning to radio stations 1 Press TUNER to select the tuner -» TUNER is scrolled. 2 Press TUNER again to select the desired waveband. -► The selected waveband is displayed. 3 Keep 44 SEARCH or ►► SEARCH pressed for more than half a second. -» The selected waveband and GERRCMING are displayed. The radio tunes to a station with sufficient signal strength. 4 Repeat searching until you find the desired station. 0 To tune to a weak station, briefly press 44 SEARCH or ►► SEARCH as often as necessary for optimum reception. Storing radio stations It is possible to store up to 40 radio stations. Stations can be selected and programmed automatically or you can do that yourself. Programming will overwrite your former presets starting from the last active preset station. After programmi...
Ce manuel est également adapté pour les modèles :Stéréo - FWR55 (7.72 mb)