


Évaluations - 4, GPA: 4
(

 )
)
|
Photos et spécifications LG XB-D12X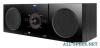 |


Facilité d'utilisation
• Do not connect your unit to TV via your VCR. The DVD image could be distorted by the copy protection system. Antenna (Aerial) Connection Connect the supplied FM/AM(optional) antennas to listen to the radio. • Connect the AM loop antenna to the AM antenna connector. (optional) • Connect the FM wire antenna to the FM antenna connector. Note : Note :Note : • To prevent noise pickup, keep the AM loop(optional) antenna away from the unit and other component. • Be sure to fully extend the FM wire antenna. • After connecting the FM wire antenna, keep it as horizontal as possible. Speaker System Connection Connect the speaker wires to the speaker terminals. Note : Note :Note : • Be sure to match the speaker wires to the appropriate terminal on the components, + to + and – to –. If the cables are reversed, the sound will be distorted and will lack bass. • If you use front speakers with low maximum input rating, adjust the volume carefully to avoid excessive output on the speakers. 4 Operation Operation using the front Panel Portable Device Portable in cable USB Memory, MP3 Player (or Memory Card Reader, etc.) 1. DISPLAY WINDOW 2. 1/[ POWER FUNC. (function select)button (DVD/CD,PORTABLE,FM, AM (optional),USB ) 3. • STOP /MO./ ST. SET(x xx) • PLAY /PAUSE (B BB/ //[ [[] ]] ) • TUNING (-) - Tuner CD SKIP/ SCAN (. .. ) • TUNING (+)- Tuner CD SKIP/ SCAN (> >> ) ALL ALL • Volume control knob 4. PORTABLE IN Jack Using PORTABLE device When you connect a portable music playing device to the PORTABLE IN jack on this device by using a ( 3.5mm)mini stereo cable (not supplied), you can here the sound being outputted from the portable device through the speaker. 1.Connect the PORTABLE IN jack on this device to a headphone jack on another portable one by using a cable. 2.Press FUNC. on the front panel repeatedly or PORTABLE(on the remote control) button. 3.Start playing the connected portable device. 4.Adjust the volume by using VOLUME. 5. USB port USB Function You can enjoy the media files such as tunes (MP3/WMA/PHOTO/VIDEO file) saved in an MP3 player or USB memory by connecting the storage device to the USB port of this unit. Compatible Devices 1. Devices which require additional program installation when you have connected it to a computer, are not supported. 2. MP3 Player : Flash type MP3 player. The MP3 player requiring installation of a driver is not supported. 3. USB Flash Drive : Devices that support USB2.0 or USB1.1. To Remove the USB from the unit 1. Choose the other functions except USB function in order to remove the USB. 2. Remove the USB from the unit. • Do not extract the USB device in operating. • A back up demands to prevent a data damage. • If you use a USB extension cable or USB hub, the USB device might not be recognized. • A device using NTFS file system is not supported. (Only FAT (16/32) file system is supported.) • The USB function of this unit does not support all USB devices. • Digital camera and mobile phone are not supported. • This unit is not supported when the total number of files is 1000 or more. • If the drive of USB device is two or more, a drive folder is displayed on the screen. If you want to move to the previous menu after you select a folder, press RETURN. 6. • TIMER • CLOCK 7. DISC door ENGLISH 5 Operation using the Remote Control 2 3 4 1 16 15 14 13 9 10 11 12 5 6 7 8 RDS PTY 1. POWER( 1) 2. FUNCTION SELECT (TUNER/BAND,DVD, PORTABLE, USB) 3. NUMERIC buttons (0- 9) Selects a service, program number directly or selects numbered options in a menu. 4. • EQ (EQUALIZER Effect) You can choose 4 fixed sound impressions Each time you press the button the setting changes in the display window as shown below. NORMAL > ROCK > POP > CLASSIC > NORMAL... • XDSS plus XDSS (Extreme Dynamic Sound System) Press XDSS plus to reinforce treble, bass and the surround effect. The “XDSS” or “NORMAL” indicator lights. DVD/DivX/ACD : XDSS - NORMAL MP3/WMA : XDSS > MP3 -- OPT > NORMAL > XDSS 5. • SOUND MODE You can enjoy surround sound simply by selecting one of the pre-programmed sound fields according to the program you want to listen to (2 ch. sound only). Press SOUND MODE repeatedly. BYPASS > STUDIO > CLUB > HALL > THEATER 1 > CHURCH > BYPASS... Note: Note:Note: Initial sound mode is BYPASS. • AUDIO AUDIO language: During playback, press AUDIO repeatedly to hear a different audio language or audio track. DivXDVD AUDIO channel: Press AUDIO repeatedly during playback to hear a different audio channel (Stereo., Left or Right). • SUBTITLE During playback, press SUBTITLE repeatedly to select a desired subtitle language. DivXDVD • RETURN ( ) Removes the setup menu. 6. SETUP 7. • b/B/v/V (left/right/up/down) (Selects an option in the menu) • PRESET -/+ (v vv/V VV) (Selects program of radio) Press PRESET -/+ (v vv/V VV) repeatedly to select the preset station you want. Each time you press the button, the unit tunes in one preset station at a time. Preset radio stations in the unit’s memory first. (see “Presetting radio...