


Évaluations - 4, GPA: 4
(

 )
)
|
Photos et spécifications JVC XM-G6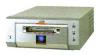 |


Facilité d'utilisation
which are located either on the rear, bottom or side of the cabinet. Retain this information for future reference. Model No. Serial No. LVT0378-002A [B] INSTRUCTIONS REC REC PAUSE SAMPLING RATE CONVERTER MINIDISC RECORDER XM-G6 Warnings, Cautions and Others CAUTION To reduce the risk of electrical shocks, fire, etc.: 1. Do not remove screws, covers or cabinet. 2. Do not expose this appliance to rain or moisture. Caution: Proper Ventilation To avoid risk of electric shock and fire, and to prevent damage, locate the apparatus as follows: 1 Front: No obstructions and open spacing. 2 Sides/ Top/ Back: No obstructions should be placed in the areas shown by the dimensions below. 3 Bottom: Place on the level surface. Maintain an adequate air path for ventilation by placing on a stand with a height of 10 cm or more. Front view Side view 1 cm 15 cm 15 cm 15 cm 10 cm 1 cm 15 cm 15 cmAX-UXG6 TD-UXG6 XT-UXG6R XM-G6 AX-UXG6 TD-UXG6 XT-UXG6R XM-G6 MPORTANT FOR LASER PRODUCTS REPRODUCTION OF LABELS 1 CLASSIFICATION LABEL, PLACED ON REAR 2 WARNING LABEL, PLACED INSIDE THE UNIT ENCLOSURE CLASS 1 LASER PRODUCT DANGER: Invisible laser VARNING: Osynlig laser- radiation when open and stralning nar denna del ar interlock failed or defeated. oppnad och sparren ar AVOID DIRECT EXPOSURE urkopplad. Betrakta ej TO BEAM. (e) stralen. (s) ADVARSEL: Usynlig laser-VARO: Avattaessa ja suostraling ved abning, nar jalukitus ohitettaessa olet sikkerhedsafbrydere er ude alttiina nakymattomalle af funktion. Undga uds.t-lasersateilylle. Ala katso telse for straling (d) sateeseen. (f) 1. CLASS 1 LASER PRODUCT 2. DANGER: Invisible laser radiation when open and interlock failed or defeated. Avoid direct exposure to beam. 3. CAUTION: Do not open the top cover. There are no user serviceable parts inside the Unit; leave all servicing to qualified service personnel. Introduction We would like to thank you for purchasing one of our JVC products. Before operating this unit, read this manual carefully and thoroughly to obtain the best possible performance from your unit, and retain this manual for future reference. Welcome to XM-G6 XM-G6 is MiniDisc Recorder exclusively designed for UXG6R micro component system. Although you cannot operate this MD recorder without UX-G6R, this integration offers enhanced features to simple and easy operations systematized on UX-G6R. Since the basic settings and common operations are almost identical to those of UX-G6R, this manual mainly explains MD related operations. Concerning UX-G6R’s settings and operations, refer to its Instructions for details. • The following marks are used in this manual: Gives you warnings and cautions to prevent from a damage or risk of fire/electric shock. Also gives you information which is not good for obtaining the best possible performance from the unit. Gives you information and hints you had better know. Precautions Installation • Install in a place which is level, dry and neither too hot nor too cold — between 5°C (41°F) and 35°C (95°F). • Install the unit in a location with adequate ventilation to prevent internal heat built-up in the units. • Leave sufficient distance between the unit and a TV. DO NOT install the units in a location near heat sources, or in a place subject to direct sunlight, excessive dust or vibration. Power sources • The power source of this unit is controlled by UX-G6R’s system operation. Refer to its Instructions. • When connecting the unit to the UX-G6R, make sure to unplug the AC power cord of the UX-G6R from the wall outlet. Moisture condensation Moisture may condense inside the unit in the following cases: • After starting heating in the room • In a damp room • If the unit is brought directly from a cold to a warm place Should this occur, the system may malfunction. In this case, leave the unit turned on for a few hours until the moisture evaporates, unplug the AC power cord, and then plug it in again. DO NOT disassemble the unit since there are no user serviceable parts inside. If anything goes wrong, unplug the AC power cord and consult your dealer. Contents Introduction .......................................................... 1 Welcome to XM-G6 ............................................................. 1 Precautions ........................................................................... 1 Contents ................................................................. 2 Location of the Buttons and Controls ................. 3 Front Panels .......................................................................... 4 Remote Control (belongs to UX-G6R) ................................ 4 Getting Started...................................................... 5 Unpacking ............................................................................ 5 Connecting the System Control Cable and the External Wire .................................................................................. 5 Connecting Another Digital Audio Equipment .................... 6 Playin...