


Évaluations - 4, GPA: 3.8
(

 )
)
|
Photos et spécifications Canon PowerShot SD3500 IS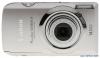 |


Facilité d'utilisation
-During filtered playback. 117 Protecting Images You can protect important images so that they cannot be accidentally erased with the camera (pp. 30, 120). Choose :. .Touch o, then drag vertically up or down the menu to the left to choose :. ..Once it is set, will appear. .To unlock an image, touch o again, then drag vertically up or down the screen to choose :. If you format the memory card (pp. 22, 51), protected images will also be erased. Protected images cannot be erased with the camera’s erase function. To erase an image, cancel protection first. Using the Menu Choose [Protect]. . Touch o, then n to choose the 1 tab, and touch [Protect]. Choose a selection method. . Touch a selection method. . Touch Uto return to the menu screen. Protecting Images Choosing Images Individually Choose [Select]. . Follow Step 2 on p. 118 to touch [Select]. Choose images. . Drag horizontally on the screen to choose an image, then touch the screen. • Once set, will appear on the screen. . Touching the screen again deselects the image, and disappears. . To choose multiple images, repeat the above operation. If you switch shooting modes or turn off the power before performing the operations in Step 3, images will not be protected. Protect. . If you touch U, a confirmation screen will appear. . Touch [OK]. • The images will be protected. Choose All Images Choose [All Images]. . Follow Step 2 on p. 118 to touch [All Images]. Protect images. . Touch [Protect]. You can unlock groups of protected images if you choose [Unlock] in Step 2. Erasing All Images You can erase all images at once. Since erased images cannot be recovered, exercise adequate caution before erasing. Protected images (p. 118) cannot be erased. Choose [Erase]. . Touch o, then n to choose the 1 tab, and touch [Erase]. Choose a selection method. . Touch a selection method. . Touch Uto return to the menu screen. Choosing Images Individually Choose [Select]. . Follow Step 2 above, touch [Select]. . Drag across the screen horizontally to choose an image, then touch the screen. • Once set, will appear on the screen. . Touching the screen again deselects the image, and disappears. . To choose multiple images, repeat the above operation. Erase. . If you touch U, a confirmation screen will appear. . Touch [OK]. Erasing All Images Choose All Images Choose [All Images]. . Follow Step 2 on p. 120, touch [All Images]. Erase. . Touch [OK]. Organizing Images by Category (My Category) You can organize images into categories. You can display the images in a category in Filtered Playback (p. 108) and process all images at once by using the functions below. • “Viewing Slideshows” (p. 109), “Protecting Images” (p. 118), “Erasing All Images” (p. 120), “Choosing Images for Printing (DPOF)” (p. 134) Choose ;. . Touch o, then drag vertically up or down the screen and touch ;. Choose images. . Drag horizontally across the screen to choose an image. . Touch the desired category. • The chosen category will appear in orange. . Touch the category again to cancel, and it will turn white. . To choose multiple images, repeat the above operation. Make the setting. . If you touch U, a confirmation screen will appear. . Touch [OK]. • Images are automatically categorized by shooting condition as they are shot. -: Images with detected faces, or images shot in I, For V. -: Images detected as , or in A mode, or images shot in Oor . -: Images shot in ’, w, Por t. • You can also display categories by touching o in Step 2, then choosing the 1tab, and [My Category]. Tagging Images as Favorites When you tag images as favorites, you can perform operations on just those images, or only display those images for easy viewing (p. 108). Choose an image. . Drag horizontally across the screen to choose an image. Tag an image as a favorite. .Drag as shown. ..When you view a tagged image in Detailed Information Display, will appear on the screen. . Drag again to untag the image. • If you use Windows 7 or Windows Vista and transfer tagged images to the computer, they will be given a star rating of 3 ( ) (except for movies). • Confirm that [Favorites] has been registered to Touch Actions (p. 113). Easily display images tagged as favorites In Playback mode, if you drag as shown , only images tagged as favorites will be displayed. Tagging Images as Favorites Using the FUNC. Menu Choose . . Touch o, then drag vertically up or down the menu to the left to choose . • The image will be tagged as Favorite, and will appear in Simple Information Display and Detailed Information Display. . To unlock an image, touch o again, then drag vertically up or down the menu to the left to choose . Using the Menu Choose [Favorites] . Touch o, then n to choose the 1 tab, and touch [Favorites]. Choose images. . Drag across the screen horizontally to choose an image, then touch the screen. • Once set, will appear on the screen. . Touching the screen again deselects the image and disappears. . To choose multiple images, repeat the above ope...