


Évaluations - 0, GPA: 0
(
 )
)
|
Photos et spécifications LG 22MP56HQ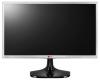 |


Facilité d'utilisation
yyThe wall mount kit will include an installation manual and necessary parts. yyThe wall mount bracket is optional. You can obtain additional accessories from your local dealer. yyThe length of screws may differ depending on the wall mount. Be sure to use the proper length. yyFor more information, refer to the instructions supplied with the wall mount. 9 USING THE MONITOR SET ENGLISH ENG USING THE MONITOR SET Connecting to a PC yyYour Monitor set supports Plug & Play*. *Plug & Play: A PC recognizes a connected device that users connect to a PC and turn on, without device configuration or user intervention. D-SUB connection Transmits analog video from your PC to the Monitor set. Connect the PC and the Monitor set with the supplied D-sub 15 pin signal cable as shown in the following illustrations. HDMI connection Transmits the digital video and audio signals from your PC or A/V to the Monitor set. Connect the PC or A/V and the Monitor set with the HDMI cable as shown in the following illustrations. ........ DC-INHDMI IND-SUB INH / P19 (sold separately) ........ DC-INHDMI IND-SUB INH / P19 NOTE yyIf you use HDMI PC, it can cause compatibility problem. yyWhen you want to use two PC in our Monitor, please connect the signal cable(D-SUB/ HDMI) respectively in Monitor set. yyIf you turn the Monitor set on while it is cold, the screen may flicker. This is normal. yySome red, green, or blue spots may appear on the screen. This is normal. NOTE yyWhen using a D-Sub signal input cable connector for Macintosh CAUTION yyConnect the signal input cable and tighten it by turning the screws clockwise. yyDo not press the screen with your finger for a long time as this may result in temporary distortion on the screen. yyAvoid displaying a fixed image on the screen for a long period of time to prevent image burn. Use a screensaver if possible. yyMac adapter For Apple Macintosh use, a separate plug adapter is needed to change the 15 pin high density (3 row) D-SUB VGA connector on the supplied cable to a 15 pin 2 row connector. USING THE MONITOR SET 10 ENG ENGLISH Peripheral device connection Connect peripheral devices to the monitor using headphone ports. Self Image Setting Function Press the power button on the rear panel to turn the power on. When monitor power is turned on, the "Self Image Setting" Function is executed automatically. (Only supported in Analog Mode) ........ DC-INHDMI IND-SUB INH / P19 (sold separately) NOTE yy"Self Image Setting" Function. This function provides the user with optimal display settings.When the user connects the monitor for the first time, this function automatically adjusts the display to optimal settings for individual input signals.(Only supported in Analog Mode) yy‘AUTO’ Function. When you encounter problems such as blurry screen, blurred letters, screen flicker or tilted screen while using the device or after changing screen resolution, press the AUTO function button to improve resolution. (Only supported in Analog Mode) NOTE yyPeripheral devices are sold separately. yyCables with angled plugs may have clearance issues, use straight plugs when possible. Straight Type Angle Type 11 CUSTOMIZING SETTINGS ENG ENGLISH CUSTOMIZING SETTINGS 1 Press the desired button on the rear of the Monitor set. 2 Change the value of the menu item by pressing the buttons on the rear of the Monitor set. To return to the upper menu or set other menu items, use the up arrow () button. 3 Select EXIT to leave the OSD menu. Front Monitor set Buttons Rear Button Description Accesses the main menus.(See p.12) OSD Locked/OSD Unlocked This function allow you to lock the current control settings, so that they cannot be inadvertently changed. Press and hold the MENU button for several seconds. Then OSD of “OSD Lock” will appear. After that, user can select lock or unlock by pressing left/right button. If user selects the “Lock” icon by pressing the “OK” button, the message “OSD Locked” will appear. Otherwise, “OSD Unlocked” will appear. After selecting the “Lock”, If you want to change to Unlock, you can push the “MENU” button for several seconds. The message “OSD Unlocked” will appear. Use this button to enter Reader Mode menu. Its function works to display screen as paper-like picture for Eye comfort.If you want to more information(See p.17). Use this button to enter SUPER ENERGY SAVING, Picture Mode, SUPER RESOLUTION+, DUAL DISPLAY, DUAL WEB menus.(See p.18 ~21) When adjusting your display settings, always press the AUTO button on the MONITOR SETUP OSD. (Only supported in Analog Mode) The best display mode 1920 x 1080 You can choose the input signal. • When two input signals are connected, you can select the input signal (D-SUB/HDMI) you want. • When only one signal is connected, it is automatically detected. The default setting is D-SUB. EXIT EXIT the OSD(On Screen Display). (Power Button) Turns the power on or off. Power Indicator The power indicator stays white if the display is running properly (On Mode). If the di...
Ce manuel est également adapté pour les modèles :Moniteurs - 22MP56HQ-S (8.68 mb)
Moniteurs - 24MP56HQ (8.68 mb)
Moniteurs - 24MP56HQ-S (8.68 mb)