


Évaluations - 2, GPA: 4
(

 )
)
|
Photos et spécifications Sony STR-DA5600ES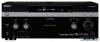 |


Par ce dispositif a également d'autres instructions :


Facilité d'utilisation
2 Press OPTIONS. The option menu appears. 3 Select “Name Input,” then press . The soft keyboard appears on the screen. 4 Press V/v/B/b and to select a character one by one. 5 Select “Finish,” then press . A.P.M. You can set the A.P.M. (Automatic Phase Matching) function in the DCAC (Digital Cinema Auto Calibration) function (page 47). x OFF Does not activate the A.P.M. function. x AUTO Switches the A.P.M. function on or off automatically. Notes • Even when you set this item to “AUTO,” this function does not work if you select “OFF” for the calibration type (page 115). • This function does not work in the following cases. – The multi-channel input is selected. – “2ch Analog Direct” is being used. – DTS-HD signals with a sampling frequency of 88.2 kHz and higher are being received. – Dolby TrueHD signals with a sampling frequency of 176.4 kHz and higher are being received. • Signals with a sampling frequency of 88.2 kHz and higher are always played back at either 44.1 kHz or 48 kHz. Speaker Relocation You can calibrate speaker positioning (configuration angle of each speaker from the measurement position) to improve the surround effect. 116GB x TYPE A x TYPE A Drawing of the relocated speaker placement x TYPE B Places four surround speakers at virtually identical angles, according to Recommendation ITU-R for 7.1 channel speaker placement. Drawing of the relocated speaker placement x OFF Does not relocate speaker positioning. Notes • This function does not work in the following cases. – When you select “OFF” for the auto calibration type (page 115). – When you set “A.P.M.” to “OFF” (page 116). – When the speaker pattern is set so that there are no surround speakers. • This function does not work in the following cases. – DTS-HD signals with a sampling frequency of 88.2 kHz and higher are being received. – Dolby TrueHD signals with a sampling frequency of 176.4 kHz and higher are being received. • Signals with a sampling frequency of 88.2 kHz and higher are always played back at either 44.1 kHz or 48 kHz. SP Pair Matching Lets you set the pair match mode for the auto calibration EQ pattern. x ALL Calibrates all the speakers using the pair match processing of the left and right channels for each pair of speakers. x SUR Calibrates the surround speakers and the surround back speakers using the pair match processing or the left and right channels for each pair of speakers. x OFF Calibrates each speaker individually. Notes • This function does not work when auto calibration is not performed. • You cannot set “SP Pair Matching” to “ALL” when you select “Front Reference” for the auto calibration type (page 115). Front Ref Type You can set the reference value when you select “Front Reference” for the auto calibration type (page 115). x L/R Sets the data of the left and right channels to the reference value. continued 117GB Adjusting Settings x L x L x R Sets the data of the right channel to the reference value. Notes • This function works only when you select “Front Reference” for the auto calibration type (page 115). • Perform auto calibration after you set “Front Ref Type.” Speaker settings You can adjust each speaker manually. You can also adjust the speaker levels after auto calibration is completed. Note The Speaker settings are only for the current “Seating Position.” Impedance You can set the speaker impedance. For details, see “9: Setting the speakers” (page 44). x 4 . x 8 . Speaker Pattern Selects “Speaker Pattern” according to the speaker system which you are using. Select the speaker pattern before you perform auto calibration. Center Mix You can set the analog downmix settings on or off. x OFF If the speaker pattern is set so that there is a center speaker, this setting is set to “OFF” automatically. x ON We recommend you set “Center Mix” to “ON” to enjoy digital audio with high quality sound when you do not have a center speaker connected. Analog downmix works when you set “Center Mix” to “ON.” This setting is also effective to input signals from the MULTI CHANNEL INPUT jacks. 118GB Sur Back Assign Sur Back Assign x OFF x BI-AMP x ZONE2 Note Set “Sur Back Assign” to “OFF,” then connect the surround back speakers to this receiver when you want to change the connection from a bi-amplifier connection or a zone 2 connection to a surround back speakers connection. Re-set up the speakers after you connect the surround back speakers. See “Auto Calibration” (page 47) or “Manual Setup” (page 119). Manual Setup You can adjust each speaker manually on the Manual Setup screen. You can also adjust the speaker levels after auto calibration is completed. To adjust the speaker level You can adjust each speaker’s level (center, surround left/right, surround back left/right, front high left/right, subwoofer). 1 Select the speaker on the screen for which you want to adjust the level, then press . 2 Select “Level:,” then press . 3 Set the level of the selected speaker, then press . You can adjust the level from –20 dB to +10d...