


Évaluations - 4, GPA: 3.8
(

 )
)
|
Photos et spécifications Roland F-50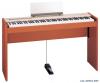 |


Par ce dispositif a également d'autres instructions :
Facilité d'utilisation
F 3 (included in left-hand areas) B A A/B tones have settings optimized for playing with the keyboard divided into right-hand and left-hand When the F-50 is turned on, the tone is reset to Grand Piano. zones. With some tones, the octave (pitch) settings may differ on opposing sides of the border between the keyboard zones. 1 2 When Dual play (p. 16), only tone number 1 or 2 can be selected. If you use Dual play with a 1. Press any Tone button. Tone button for which tone number 3 or 4 is selected, The indicator on the selected button lights up. tone number 1 will be selected for that Tone 2. Press the [Variation] button to select the Tone. button. Each time you press the [Variation] button, the button’s indicator will change color, and the four sounds will be selected successively. With certain tones, the The Tone you’ve selected is heard when you finger the keyboard. sounds may seem to be distorted. The next time you choose this Tone button, the tone you’ve selected here is played. Playing the Keyboard Layering Two Instrument Sounds (Dual Play) You can hold down one Tone button and press another Tone button to layer two sounds for playing together. This function is called “Dual Play.” Example: Combining Piano and Strings 1 1. While pressing the [Piano] button, also press the [Strings] button. The indicators for both buttons light. When you then play the keyboard, the layered sounds of the piano and strings will play. The [Variation] button indicator now indicates the tone for the right button of the two selected Tone buttons. When you press the [Variation] button, the indicator color switches, and the tone assigned to the right tone button is changed. Of the two selected tones, to change the tone assigned to the left tone button, first exit Dual Play, then reselect the tone. 2. To cancel Dual Play, press either Tone button. When you play the keyboard, only the tone of the button you pressed will be heard. You can adjust the volume balance between the two selected tones in Dual Play. For details, refer to “Changing the Volume Balance in Dual Play” (p. 21). When the power is turned on, the sound of the left Tone button is set to be louder. You can only select tone number one or two in Dual Play. If you use Dual play with a Tone button for which tone number 3 or 4 is selected, tone number 1 will be selected for that Tone button. Playing the Keyboard Adding Reverberation to Sounds (Reverb Effect) You can apply a reverb effect to the notes you play on the keyboard. Applying reverb adds pleasing reverberation to what you play, so it sounds almost as if you were playing in a concert hall. 1, 2 1. Press the [Reverb] button, and confirm that its indicator has lighted. The reverb effect is applied to the sound. 2. Pressing the [Reverb] button once more turns off the button’s indicator and cancels the reverb effect. When you play back an demo song, the reverb effect will automatically be turned on (the button’s indicator lights). Since each song has been supplied with its own reverb settings, the way in which reverb is applied changes when you switch demo songs. You can select the depth of reverb effect. For details, refer to “Changing the Depth of the Reverb Effect” (p. 21). Recording Your Performance Recording Your Performance You can easily record your performances. A recorded performance can be played back to hear your own playing. Notes Regarding Recording • Only one song can be recorded. If you begin recording when a previously recorded performance exists, the previous performance will be erased. • Recorded performances are erased when the power is turned off. If you want to keep your performance, you can either record it on an external audio device (p. 22), or use an external MIDI device to save the performance data on a floppy disk (p. 25). Recording a Performance Record your performance. 1 2, 44, 5 1. Select the tone that you want to play (p. 15). 2. Press the [Rec] button. The [Rec] button’s indicator will blink, and you will be in recording-standby mode. To cancel recording, press the [Rec] button once more. 3. Recording will start when you play the keyboard. The [Rec] button’s indicator stops flashing and remains lit. 4. To stop recording, press the [Play] or [Rec] button. The indicator for the [Rec] button will go dark. Play back the recorded performance 5. Press the [Play] button. Once again press the [Play] button, and playback will stop. Some Handy Functions Some Handy Functions Changing the Keyboard’s Touch You can change the touch sensitivity, or response of the keys. The setting is at “Medium” when the F-50 is powered up. Press 1. Press the [Light] button or the [Heavy] button. The indicator for the selected button lights. When the [Light] button is pressed, the button’s indicator lights up and the keyboard is set to a “light” touch. When the [Heavy] button is pressed, the button’s indicator lights up and the keyboard is set to a “heavy” touch. When the [Light] and [Heavy] buttons are pressed simult...